

Explore Knowledge Articles
Back


Application Note #232 - How to Retrofit a Wall-Mounted RF seeTouch Keypad into an Existing Home
Overview
This application note explains how to retrofit Lutron wall mounted wireless keypads into existing homes. It covers common installation scenarios such as adding a keypad to a new or existing wall location and replacing single pole or 3 way or 4 way switches. The document identifies the appropriate wired keypad hybrid keypad or Pico remote control solution based on available wiring and system type and includes clear diagrams to support installation across Caséta Wireless, RadioRA 2, RadioRA 3, and HomeWorks systems.
Models
Adding a Keypad to a Blank Wall
| If you can run electricity (120 V~) to this location: | If you CANNOT run electricity to this location: | ||
|---|---|---|---|
| seeTouch Keypad | Sunnata Keypad | Pico Remote Control and Wall-Mounting Bracket | |
| Caséta Wireless | PJ2-WALL-WH-L01 | ||
| RadioRA 2 | RRD-W | ||
| RadioRA 3 | RRD-W | RRST-W | |
| HomeWorks | HQRD-W | HRST-W | |
| Wallplate | CW-1 or SC-1 | CW-1 or SC-1 | |
| Installation | Run 120 V~ from a nearby receptacle or electrical box to the new location. | Mount the wall-mounting bracket per the included instructions and attach the Pico remote control. | |
Adding a Keypad to the Side of an Existing Group of Dimmers / Switches
| If you can extend / replace the electrical box behind the wall, and the electrical box has access to both the 120 V~ hot and neutral connections: | If you CANNOT extend / replace the electrical box behind the wall: | ||
|---|---|---|---|
| seeTouch Keypad | Sunnata Keypad | Pico Remote Control and Wallplate Bracket | |
| Caséta Wireless | PJ2-* and PICO-WBX-ADAPT | ||
| RadioRA 2 | RRD-W | ||
| RadioRA 3 | RRD-W | RRST-W | |
| HomeWorks | HQRD-W | HRST-W | |
| Larger Wallplate | 2-Gang: CW-2 / SC-2 | 3-Gang: CW-3 / SC-3 | 4-Gang: CW-4 / SC-4 | ||
| Installation | Before installing the new wallplate, attach the wallplate bracket to the new location of the wallplate. Attach the wallplate to the group of existing dimmers / switches and attach the Pico remote control to the wallplate bracket. | ||
Replacing a Light Switch with a Keypad in a Single-Pole Circuit
| If the electrical box has access to both the hot and neutral connections (120 V~): | If a neutral connection is NOT available where you want the keypad: | ||
|---|---|---|---|
| seeTouch Keypad | Sunnata Keypad | Pico Remote Control and Wallplate Bracket | |
| Caséta Wireless | PJ2-* and PICO-WBX-ADAPT | ||
| RadioRA 2 | RRD-HN | ||
| RadioRA 3 | RRD-HN | RRST-HN | |
| HomeWorks | HQRD-HN | HRST-HN | |
| Wallplate | CW-1-* or SC-1-* | CW-1-* or SC-1-* | |
| Installation See product installation instructions for full details. | Replace the light switch with the hybrid keypad. Connect the hybrid keypad's white wire to the neutral wire. | Remove the light switch, connect the hot and switched-hot wires together with a wire nut, install the wallplate bracket, attach the Pico remote control and the wallplate. | |
Replacing Light Switches with a Keypad in a 3-Way / 4-Way Circuit
| If 120 V~ hot and neutral connections are available where you want the keypad: | If hot and neutral connections are NOT available where you want the keypad: | ||
|---|---|---|---|
| seeTouch Keypad and Dimmer | Sunnata Keypad and Dimmer | Pico Remote Control, Wallplate Bracket, and Dimmer | |
| Caséta Wireless | Pico: PJ2 Adapter: PICO-WBX-ADAPT Dimmer: PD-6WCL | ||
| RadioRA 2 | Keypad: RRD-W Dimmer: RRD-PRO | Pico: PJ2 Adapter: PICO-WBX-ADAPT Dimmer: RRD-PRO | |
| RadioRA 3 | Keypad: RRD-W Dimmer: RRD-PRO | Keypad: RRST-W Dimmer: RRST-PRO-N | Pico: PJ2 Adapter: PICO-WBX-ADAPT Dimmer: RRST-PRO-N or RRD-PRO |
| HomeWorks | Keypad: HQRD-W Dimmer: HQRD-PRO | Keypad: HRST-W Dimmer: HRST-PRO-N | Pico: PJ2 Adapter: PICO-WBX-ADAPT Dimmer: HRST-PRO-N or HQRD-PRO |
| Installation | See installation information below | ||
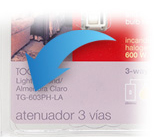
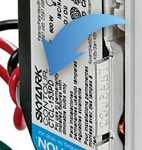
| Incoming 120 V~ power and outgoing lighting load connections are in the same 3-way location: | Incoming 120 V~ power is at one 3-way location and the outgoing lighting load connection is at the other 3-way location: | |
|---|---|---|
| Example of the Existing Wiring: | ||
Option A:
| ||
Option B:
|
The examples shown here are for educational purposes only. Actual wire colors and connection methods may differ from what is shown here. Consult the product's installation instructions for full details.
NOTE: If the incoming 120 V~ power is run directly to the fixture, a wired keypad will NOT work and you must use the Pico remote control option.
How to Use a Single-Pole, Hybrid Keypad in a 3-Way Application (using a Pico Remote Control)
The hybrid keypad acts like a single-pole dimmer/keypad and a Pico remote control is added to the other 3-way location without being connected to the wiring.
| Incoming 120 V~ power and outgoing lighting load connections are in the same 3-way location: | Incoming 120 V~ power is at one 3-way location and the outgoing lighting load connection is at the other 3-way location: | |
|---|---|---|
| Example of the Existing Wiring: | ||
Option A:
| ||
Option B:
|
How to Use a Single-Pole, Hybrid Keypad in a 3-Way Application (using a Dimmer)
The hybrid keypad is rewired to act like a standard keypad (the internal dimmer is not used) and a dimmer is used in the other 3-way location.
NOTE: This solution is NOT recommended. The hybrid keypad will appear as a lighting load in the Lutron App or third-party integration despite the device acting only as a keypad and not controlling the actual load in this application. This could cause confusion for the end user.
| Incoming 120 V~ power and outgoing lighting load connections are in the same 3-way location: | Incoming 120 V~ power is at one 3-way location and the outgoing lighting load connection is at the other 3-way location: | |
|---|---|---|
| Example of the Existing Wiring: | ||
Option A:
| ||
Option B:
|
How to Use a Single-Pole, Hybrid Keypad in a 3-Way Application (using a -W Keypad)
The hybrid keypad acts like a single-pole dimmer/keypad and power is run to the other 3-way location to operate a standard keypad.
| Incoming 120 V~ power and outgoing lighting load connections are in the same 3-way location: | Incoming 120 V~ power is at one 3-way location and the outgoing lighting load connection is at the other 3-way location: | |
|---|---|---|
| Example of the Existing Wiring: | ||
Option A:
| ||
Option B:
|
Was this article helpful?
Thank you! We appreciate your feedback!